


Things To Know About Cleaning a Foundation Brush

When was the last time you cleaned your foundation brush? We’re not talking about a quick wipe-off to remove excess powder or flick away dust. We mean an honest, thorough clean with soap.
The kind of clean where you get all the bristles wet and rinse them until the water runs clear.
If your answer is that you’ve never cleaned your brushes, or maybe it’s been ages, there’s no shame here. You aren’t alone.
But that doesn’t mean you should stay that way.
Today is a great day to stop using a dirty makeup brush.
Here’s how and why you should clean those brushes:
Your Foundation Brush Matters
First things first, we know what you’re thinking -- why not just buy a new one? Of course, you can buy a new foundation brush. But if you’re shopping for the expensive stuff, this adds up quickly. Before you know it, you’re dropping far more cash on makeup brushes than is necessary. And you’re throwing out good brushes in the process. There’s no need to get rid of your brushes just because they’ve seen better days.
Good brushes can even get better with time. As they’re more worn-in, they become softer and better at placing products on your face. That’s an added benefit that purchasing new just can’t provide.
However, you can’t continue using the same brush if it is full of matted and piled-on products. If you’re using a sponge, it can soak up too much makeup and may become moldy or full of bacteria.
Give your foundation brush the attention it deserves and wash it out.
Your Brush Might Be Full of Bacteria
Yuck! Your makeup brushes are chalked full of germs. Think about it; you put your brushes on your face daily, and there’s no telling what they’re holding on to.
They sit in the bathroom, in a bag, or on your vanity, exposed to whatever comes their way -- dirt, residue, product buildup, or dead skin cells until you again put them on your face.
If you handle your bristles or lick them, the germs have only compiled. Think about how much stuff is growing on your foundation brush.
Stop what you’re doing. It’s time to get to cleaning before more germs gather. We’re serious.
If the wrong types of terms are in play, they can cause more damage to the skin, leaving it irritated or causing breakouts. If you think about it, your brushes are a breeding ground for bacteria that you’re depositing directly onto your skin and into your pores. Where your face was otherwise clean, you introduced new species and caused it to react to unwanted materials. Yikes!
Instructions May Differ
Not all foundation brushes are created equally. That’s why it’s so important to follow manufacturer instructions on how to clean your brush. Avoid harsh cleaners or chemicals in most cases, opting for a gentle brush cleanser instead, and pay attention to what could be harmful to a brush.
For instance, cold water can actually be damaging to expensive brushes, as can soap with too many harsh fragrances. Opt for mild cleansers and clean gently to cleanse your brushes effectively, without causing them any additional harm.
Check your brush -- whether bristles or sponge -- when purchasing so you know how it should be properly cleaned. While you’re at it, see if there’s a recommendation on how often to wash the brush. Each manufacturer will have its own recommended timeline for cleaning, too.
How to Clean Your Brush Effectively
Understanding the best and most thorough way to clean your foundation brush can help you keep things bacteria-free without damaging your beloved bristles.
Step One: Grab Your Brush or Sponge
Step one, get a new brush or sponge. It’s a good idea to wash them all at once, so you’re on a set cleaning schedule. So, while you plan to clean your foundation brush, grab your eyeshadow brushes, blenders, and more.
Gather them all in one place and make sure you’re working with a clean sink. (Not doing so defeats the entire purpose.)
Step Two: Rinse
Next, add lukewarm water to the sink or rinse your brushes until they are fully wet and saturated. If you have a lot of excess product on the brush, you should go ahead and rinse it off before you scrub with soap. Use your hand or fingers to dab out excess foundation gently.
Step Three: Cleanse
Then, add a dab of soap or makeup brush cleaner. Use what you have on hand, but gentle is best. Baby soap, baby shampoo, or another liquid soap that’s free from fragrance or dyes are your best bet. Some dish soaps may work, like Dawn dish soap, but you should be careful about ingredients like synthetic colors and fragrances.
Step Four: Scrub
Now it’s time to scrub scrub scrub. Use your fingers or hand and swirl up a lather into the brush head. You will likely see a lot of foundation or concealer come out at this time, and this is normal. After all, that’s why we’re deep-cleaning in the first place. Add more soap as needed and continue to lather up those dirty makeup brushes.
You can use textured mats to clean brushes by rubbing the brush on the texture, but these are an optional part of your cleaning routine.
Rinse, lather, and repeat a few times. Once your brush has regained its color or is no longer releasing foundation-colored suds, it’s time to rinse.
Properly Rinsing Your Makeup Brush
Again, heat your water until it's warm. Too hot or too cold, and you could end up damaging the brush itself. Rinse and squeeze out the soap over and over again, until your brush produces clean water.
If you find it wasn’t as clean as you thought it was, add more soap and continue to massage out the excess makeup.
The longer it’s been since the brushes were washed, the longer this part will take. Going forward, it will be easier to manage and maintain.
Remember to wash your foundation brush regularly to keep it clean and functional. If it helps, write it on your calendar or set a digital reminder to wash your brushes the next go-round.
Let It Air Dry
Finally, it’s time to consider how your brushes will dry. Obviously, you don’t want to use them while they’re still wet. (In some cases, however, like sponges, you will still use them damp.) So plan accordingly. It’s often good to clean your brushes right after you’ve applied makeup.
Give your brushes ample time to air dry, and do your best to get rid of excess water that could damage the glue prior to setting them out to dry.
Place them on a flat surface to dry, such as a counter or side of the sink. You can even lay out a paper towel or clean towel to absorb excess moisture. In any case, be sure to let the brushes dry on their own to prolong their longevity and original shape.
You can turn them or just plop them by the sink and pick them up when you get home from work that day.
Like with any makeup process, cleaning your foundation brush can be a process that’s either as easy or as complicated as you’d like it to be.
Sponge Brushes
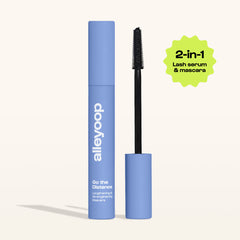
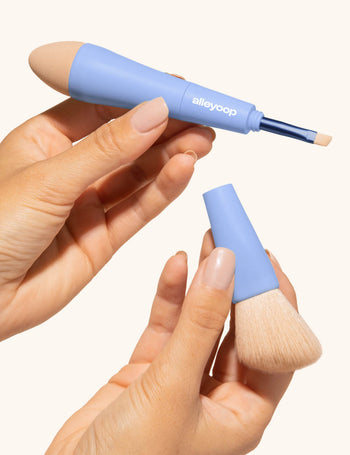
We’ll throw one more curveball your way: the sponge brush. It’s a makeup sponge but on a stick. Alleyoop has its own version (which is killer, if we do say so ourselves). It’s a growing trend that combines the best of both worlds when it comes to makeup brushes.
Using them is faster, smoother, and it provides a duo in which you can apply a smooth product to your face. Seriously, it’s a game-changer. Choosing the right brush can also make a world of difference.
To learn more about sponges on a stick -- AKA Alleyoop’s Multi-tasker, a four-in-one makeup brush -- check it out here.
But when it comes to cleaning them, it’s not any more difficult than cleaning any other type of brush, you just have to account for the shape.
Wet them with warm water like normal. Add soap and suds it up, allowing all of the makeup to be cleaned from its depths. You’ll want to thoroughly rinse when done, too.
The key, however, is to make sure you’ve rinsed all the way through. Makeup can hide deep inside sponges. Thorough cleaning ensures that you’ve gotten it fresh and clean, and ready for another use.
Alleyoop’s sponge brush offers a compact way to put all your makeup brushes into a single device.
Just be sure to keep it uncapped until the interior brushes have had a chance to dry.
How Often Should You Clean Your Brushes?
Now comes the biggest question of them all. How often should you really clean your makeup brushes? How often should you really clean them to make sure they’re sanitary and working great?
The simple answer is that you should clean your makeup brushes once a week. One time in every seven applications is a good number to help keep makeup accumulation from gathering on your brushes.
However, this also depends if you wear makeup every day. Some of us work from home, or some of us don’t mind going out in public bare-faced. No matter what the case is, please give your brush a good wash after the seventh use – it deserves a nice cleanse.
Follow this routine to get better use out of your makeup brushes. It’s a simple step that can add to a longer lifespan for your makeup brushes. And while you’re at it, you can gain peace of mind knowing that your face is cleaner and safer against blemishes.
Conclusion
The biggest takeaway here? Makeup brushes were meant to be cleaned! A consistent cleaning routing can keep your brushes in better shape, even giving them more longevity and added perks. They can even get softer over time.
Cleaning your makeup brushes can also keep your skin cleaner and clearer. Avoid putting unknown germs directly onto your face; keep your brushes clean instead.
As far as chores go, this is about as easy as they come. Don’t overlook this super important step to your skincare routine. It’s one that can have added health benefits, as well as helping your makeup brushes last, even with frequent use.
Get to cleaning your makeup brushes on a schedule of choice and start experiencing these benefits today.
Sources:
How Healthy Is Your Makeup? | UNC Healthcare


